Home renovations are a thrilling journey of transformation, breathing new life into the spaces we cherish. Whether you’ve expanded your kitchen, renovated your bathroom, or embarked on a full-scale home makeover, the end result is undoubtedly worth the effort. However, before you can fully enjoy your newly renovated space, there’s one more task to conquer: the post-renovation cleanup. The dust, debris, and remnants of the construction process can be overwhelming, but fear not, for we have your back.
In this comprehensive guide, we will walk you through every step of the process, ensuring that your home is not only beautiful but also spotlessly clean after the renovation dust settles. From essential safety precautions to room-by-room deep cleaning, we’ve got you covered. By the time you reach the end of this guide, you’ll have the knowledge and confidence to tackle even the messiest post-renovation cleanups.
Preparation Before Cleaning
Safety Precautions
Before diving into post-renovation cleaning, it’s essential to consider safety. Ensure that the construction area is free from hazards like exposed nails, sharp objects, or wet paint. Wear appropriate protective gear such as gloves, masks, and safety glasses to avoid accidents and health risks.
Gather Cleaning Supplies
To efficiently clean up after a renovation, prepare the necessary cleaning supplies, including:
- Broom and dustpan
- Vacuum cleaner with HEPA filter
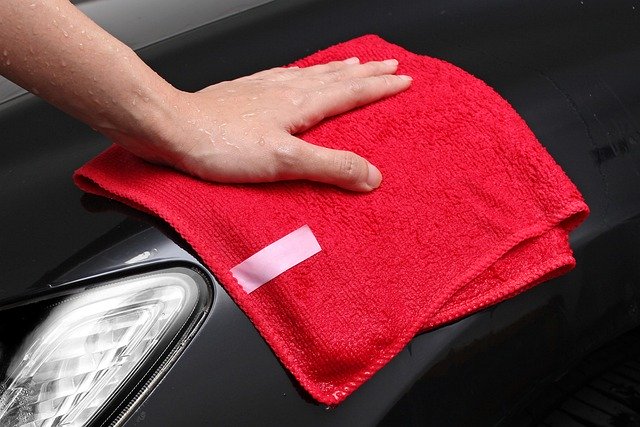
- Microfiber cloths
- Cleaning solutions (all-purpose, glass cleaner, disinfectant)
- Mop and bucket
- Trash bags
- Scrub brushes
- Putty knife for scraping
- Protective drop cloths for floors and furniture
- Duster or extended pole for high surfaces
- Rubber gloves
Ventilation
Proper ventilation is crucial during post-renovation cleanup to ensure the removal of airborne particles and fumes. Open windows and doors to allow fresh air to circulate throughout the space. Consider using fans to assist with air circulation.
Protecting Renovated Areas
Cover any newly renovated or sensitive areas that you want to keep clean during the cleaning process. Plastic sheets or drop cloths can be used to protect freshly painted walls or new flooring.
Initial Post-Renovation Cleanup
Dusting and Dry Cleaning
Begin by dusting all surfaces and fixtures. Start from the top and work your way down. Dust light fixtures, ceiling fans, and any high shelves. Pay special attention to corners and edges where dust tends to accumulate. Use microfiber cloths or dusters to avoid spreading dust around.
Vacuuming
Once you’ve removed the loose dust, it’s time to vacuum. Use a vacuum cleaner equipped with a HEPA filter to capture fine particles. Vacuum all surfaces, including floors, walls, ceilings, and any fabric furniture or window coverings. Don’t forget to vacuum vents and radiators.
Removing Debris
Collect and dispose of any construction debris or larger particles that may be on the floor or surfaces. Use a broom and dustpan for this task. Pay extra attention to corners, baseboards, and hard-to-reach areas.
Disposing of Hazardous Materials
If your renovation involved materials like lead paint, asbestos, or any other hazardous substances, ensure they are handled and disposed of in accordance with local regulations. Contact a professional for the safe removal of such materials.
Deep Cleaning: Room by Room
Kitchen
- Clean all kitchen surfaces, including countertops, cabinets, and appliances.
- Pay special attention to appliances, cleaning both the interior and exterior.
- Wash and sanitize dishes, pots, and pans.
- Scrub the sink and faucet.
- Clean the inside and outside of the microwave, oven, and refrigerator.
- Sweep and mop the floors.
Living Room
- Dust and clean all electronics, such as TVs and gaming consoles.
- Clean and dust furniture, including upholstery and leather.
- Vacuum and clean under and behind furniture.
- Wipe down all surfaces, including coffee tables and bookshelves.
- Vacuum or clean any area rugs.
- Clean and sanitize remote controls and light switches.
Bedrooms
- Wash and change bed linens.
- Dust and clean all bedroom furniture, including dressers and nightstands.
- Vacuum or clean carpets or rugs.
- Clean and sanitize light switches and doorknobs.
- Clean mirrors and windows.
Bathrooms
- Clean and disinfect all bathroom surfaces, including countertops and sinks.
- Scrub and disinfect the toilet, shower, and bathtub.
- Clean mirrors and glass surfaces.
- Replace or wash shower curtains.
- Sweep and mop the floors.
- Disinfect light switches and doorknobs.
Flooring and Carpet Cleaning
Hardwood Floors
- Sweep or vacuum to remove loose debris.
- Mop with a hardwood floor cleaner, following the manufacturer’s instructions.
- Avoid excessive moisture as it can damage hardwood floors.
Tile Floors
- Sweep or vacuum to remove loose debris.
- Mop with a tile floor cleaner or a mixture of water and mild detergent.
- Pay extra attention to grout lines, which may require scrubbing.
Carpet Cleaning
- Vacuum the carpet thoroughly to remove dust and debris.
- Consider professional carpet cleaning services for a deep clean.
- Spot clean any stains using appropriate carpet stain removers.
Final Touches
Windows and Glass
- Clean windows, mirrors, and glass surfaces using a glass cleaner.
- Wipe down window sills and frames.
- Consider washing curtains or blinds.
Light Fixtures
- Dust and clean light fixtures, including chandeliers and pendant lights.
- Replace any burnt-out bulbs.
Air Ducts and Vents
- Consider hiring a professional to clean air ducts and vents, especially if extensive renovations were conducted.
Walls and Paintwork
- Inspect walls for any marks or scuffs. Spot clean or touch up as needed.
- If walls were freshly painted, avoid cleaning until the paint has cured completely.
Furniture and Decor
- Return any furniture or decor items to their places.
- Ensure everything is clean and dust-free before placing them back.
Maintenance Tips for a Clean Home
To maintain the cleanliness of your newly renovated home, consider the following tips:
- Implement a regular cleaning schedule to prevent dust and dirt from accumulating.
- Place doormats at entrances to minimize the tracking of dirt from outside.
- Use area rugs in high-traffic areas to protect your flooring.
- Encourage family members and guests to remove their shoes when entering the house.
- Consider investing in an air purifier to maintain air quality.
Conclusion
As you stand back and admire your beautifully renovated home, the satisfaction is immeasurable. The hard work, the planning, and the dedication have all paid off. But amidst this sense of accomplishment, there’s one last crucial step to complete your journey – the post-renovation cleanup. In this comprehensive guide, we’ve unveiled the step-by-step process to ensure that your home not only looks brand new but also shines with cleanliness.
From initial dusting and dry cleaning to deep cleaning room by room, addressing floors, and adding those final touches, you’ve learned the art of making your home truly pristine. It’s a labor of love, but the result is a living space that’s not just renewed, but revitalized.
So, as you survey your revamped abode, take pride in the effort you’ve invested in every corner and crevice. A clean, renovated home is more than just a comfortable space; it’s a sanctuary, a reflection of your taste and commitment to a better living environment. Now, sit back, relax, and revel in the beauty of your newly renovated, thoroughly cleaned home. You’ve earned it!


