Tile and grout are common features in homes and businesses worldwide. They are not only versatile and durable but also add an aesthetic appeal to any space. However, over time, the grout lines and tiles can become a breeding ground for dirt, mold, and stains, leading to a diminished appearance and even potential health hazards.
In this ultimate guide to tile and grout cleaning, we will explore the comprehensive steps, techniques, and tips to help you restore your tiles and grout to their original beauty. Whether you’re a homeowner looking to rejuvenate your kitchen or bathroom, or a business owner aiming to maintain a clean and professional environment, this guide has got you covered.
Understanding the Basics of Tile and Grout
Before delving into the intricacies of tile and grout cleaning, it’s essential to understand the nature of these surfaces.
What is Tile? Tiles are hard, flat, and thin materials typically used to cover walls, floors, and other surfaces. They come in various materials, including ceramic, porcelain, stone, glass, and even metal, each with its own unique characteristics and cleaning requirements. Tiles are known for their durability, making them suitable for both indoor and outdoor applications.
Grout is the mixture of cement, water, and sometimes sand, used to fill the gaps between tiles. Grout serves several purposes, including holding tiles in place, sealing joints, and enhancing the overall appearance of the tiled surface. Grout lines can be found between tiles on floors, walls, countertops, and even in bathrooms. They come in different types, such as sanded and non-sanded grout, each designed for specific applications.
The Importance of Regular Tile and Grout Cleaning
Tile and grout cleaning is a task that often goes overlooked, but it is essential for several reasons:
- Aesthetic Appeal: Clean and well-maintained tile and grout can instantly enhance the overall look of any room. Stains, mold, and dirt can make a space appear old and neglected. Regular cleaning ensures that your surfaces continue to look fresh and inviting.
- Health and Hygiene: Tiles and grout are common in areas with high moisture, such as bathrooms and kitchens, which can make them susceptible to mold and mildew growth. These microorganisms can lead to respiratory problems and other health issues, making regular cleaning crucial for a healthy living environment.
- Durability: Proper cleaning and maintenance can prolong the lifespan of your tiles and grout. Neglecting cleaning can lead to deterioration, which may necessitate costly repairs or replacement.
- Safety: Dirty or stained tile surfaces can become slippery, posing a safety hazard, especially in areas like bathrooms and kitchens. Regular cleaning ensures that your floors and other surfaces remain safe to walk on.
Tools and Materials for Tile and Grout Cleaning
Before we dive into the cleaning process, it’s important to gather the necessary tools and materials to ensure an effective and efficient cleaning session. Here’s what you’ll need:
- Protective Gear: Depending on the cleaning products you use, it’s a good idea to have gloves, goggles, and a mask to protect yourself from chemicals and particles.
- Broom and Dustpan: Begin by sweeping the area to remove loose dirt and debris.
- Tile and Grout Cleaner: Choose an appropriate cleaner based on the type of tile and grout you have. There are various commercial cleaners available, or you can opt for homemade solutions, such as a mixture of water and white vinegar.
- Grout Brush: A stiff-bristle brush, toothbrush, or a specialized grout brush will be needed for scrubbing the grout lines.
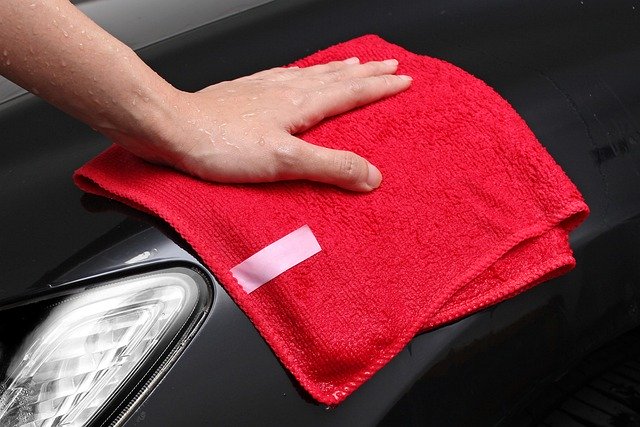
- Microfiber Cloths: These are ideal for wiping and drying the surfaces after cleaning.
- Mop: A mop with a microfiber or sponge head will help clean larger tile surfaces effectively.
- Grout Sealer: After cleaning, it’s recommended to apply a grout sealer to protect the grout from future stains and moisture.
- Steam Cleaner (Optional): For stubborn stains and deep cleaning, a steam cleaner can be highly effective.
Now that you have your tools and materials ready, let’s move on to the step-by-step process of tile and grout cleaning.
Step 1: Preparing the Area
- Clear the area: Remove any obstacles or furniture from the area you plan to clean to allow unrestricted access.
- Ventilation: Ensure proper ventilation by opening windows or doors, especially if you are using commercial cleaners. Proper airflow helps to dissipate fumes and dry the surfaces more quickly.
Step 2: Dry Sweeping
Start by using a broom and dustpan to sweep the area thoroughly. This removes loose dirt, dust, and debris from the surface and grout lines. Sweeping is essential because excess dirt can turn into mud when mixed with cleaning solutions, making the cleaning process less effective.
Step 3: Choosing the Right Cleaning Solution
The choice of cleaning solution depends on the type of tiles and grout you have. Here are some common options:
- Water and Vinegar Solution: A mixture of equal parts water and white vinegar is an effective and eco-friendly cleaning solution. It works well on most types of tile and grout. Vinegar’s acidity helps break down stains and grime.
- Commercial Tile and Grout Cleaners: There are various commercial cleaning products specifically formulated for tile and grout. Be sure to follow the manufacturer’s instructions for the product you choose.
- Homemade Baking Soda Paste: For stubborn stains and discoloration, you can create a paste by mixing baking soda with a small amount of water. Apply this paste to the stained areas and let it sit for a few minutes before scrubbing.
Step 4: Applying the Cleaning Solution
Apply your chosen cleaning solution to the tile and grout. It’s best to start with a small, inconspicuous area to test the solution’s effectiveness and ensure it doesn’t cause any damage or discoloration.
- Spray Method: Use a spray bottle to apply the solution to the surface. Allow it to sit for a few minutes to loosen the dirt and stains.
- Soaking Method: For heavily stained grout, you can soak a cloth or paper towel in the cleaning solution and place it over the grout lines. Let it sit for a longer duration to penetrate stubborn stains.
Step 5: Scrubbing the Grout
Use a grout brush or a stiff-bristle brush to scrub the grout lines. Apply enough pressure to effectively remove dirt and stains, but be careful not to damage the grout. For vertical surfaces like shower walls, a toothbrush can be very effective. Be patient, as this step may require some effort, especially if the grout is heavily stained.
Step 6: Cleaning the Tile Surface
While the grout is soaking, you can address the tile surface. For this, you can use a mop or a microfiber cloth. If you have a steam cleaner, it can also be highly effective for cleaning tile surfaces. Ensure that the cleaning solution reaches all areas of the tile and grout to ensure thorough cleaning.
Step 7: Rinsing and Drying
Once you’ve scrubbed the grout and cleaned the tile surface, it’s time to rinse away the cleaning solution. Use clean water and a mop, cloth, or sponge to wipe down the area, ensuring all cleaning residue is removed.
After rinsing, use a dry microfiber cloth to wipe down the tile and grout surfaces to prevent water spots and ensure a clean, dry finish.
Step 8: Sealing the Grout (Optional)
Grout is a porous material, and sealing it can help prevent future stains and moisture infiltration. After the grout is clean and dry, you can apply a grout sealer. Be sure to follow the manufacturer’s instructions for the sealer you choose.
Step 9: Regular Maintenance
To maintain the cleanliness and appearance of your tile and grout, it’s important to establish a regular cleaning schedule. This can help prevent the buildup of dirt, mold, and stains, making future cleaning sessions more manageable.
Tips for Effective Tile and Grout Cleaning
- Preventive Measures: To minimize dirt and stains, consider using mats or area rugs in high-traffic areas. Additionally, sealing the grout can help prevent stains and moisture penetration.
- Regular Maintenance: A little cleaning on a consistent basis can go a long way. Regularly wiping down tiles and grout lines can prevent the buildup of grime and make deep cleaning less frequent.
- Steam Cleaning: For a deeper clean, consider using a steam cleaner. Steam effectively removes dirt and kills bacteria without the need for chemicals. Be sure to follow the manufacturer’s instructions for your specific steam cleaner.
- Specialized Cleaners: Depending on the type of tile and grout you have, you might benefit from specialized cleaners. For example, natural stone tiles may require stone-specific cleaners.
- Grout Whitening: If your grout has become discolored and regular cleaning doesn’t restore its original color, you can use grout whitening products to revitalize it.
Conclusion
Tile and grout cleaning is an essential task that ensures your surfaces not only look their best but also remain safe and hygienic. By understanding the basics of tile and grout, gathering the necessary tools and materials, and following the step-by-step cleaning process, you can maintain the beauty and longevity of your tiled surfaces. Remember to establish a regular cleaning routine to prevent the buildup of dirt and stains, making future cleaning sessions more manageable. With the knowledge and tips provided in this ultimate guide, you can confidently tackle tile and grout cleaning in your home or business, ensuring a clean and inviting environment for yourself and your guests.


