Welcome to the ultimate guide on how to clean and maintain your home’s water softener. Hard water can be a nuisance, causing mineral buildup and reducing the efficiency of your appliances. A water softener helps solve this problem by removing the minerals that cause hardness in water. However, like any other appliance, regular cleaning and maintenance are essential to keep your water softener functioning optimally.
In this guide to cleaning and maintaining your home’s water softener, we’ll provide you with step-by-step instructions and expert tips to ensure your water softener continues to provide you with soft and clean water for years to come.
Table of Contents
Understanding Your Water Softener

Before we dive into the cleaning and maintenance process, let’s first understand how a water softener works and why it’s important.
- A water softener is a device that uses ion exchange to remove minerals like calcium and magnesium from the water.
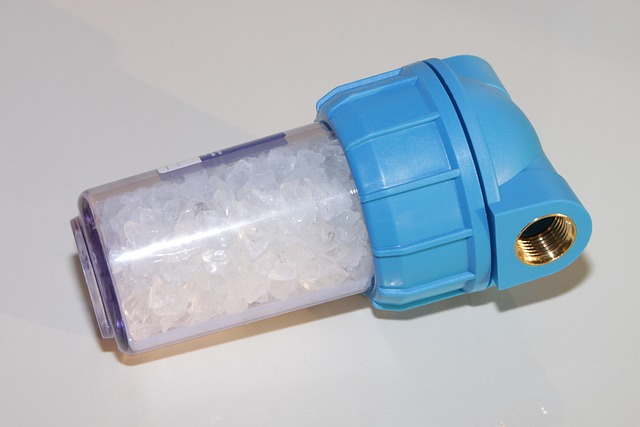
- It consists of a resin tank filled with tiny resin beads that attract and hold onto the minerals.
- When hard water flows through the resin tank, the minerals stick to the resin beads, allowing soft water to pass through.
- Over time, the resin beads become saturated with minerals and need to be regenerated to continue working effectively.
- Regular cleaning and maintenance ensure that the resin bed remains efficient and the system operates at its best.
How to Clean and Maintain Your Home’s Water Filtration System – Top Expert Guide
Signs That Your Water Softener Needs Cleaning
Now that you understand the basics, it’s important to recognize the signs that indicate your water softener requires cleaning. Pay attention to the following indicators:
- Decreased water softness: If you notice that your water is becoming harder and the effects of soft water are diminishing, it could be a sign that your water softener needs cleaning.
- Residue and buildup: Check for mineral deposits or scaly buildup on faucets, showerheads, and appliances. These deposits indicate that your water softener might not be functioning properly.
- Poor water pressure: If your water pressure has decreased, it could be due to clogged or dirty resin beads in the water softener.
- Increased salt usage: If you’re using a salt-based water softener, a sudden increase in salt consumption may suggest that the system is not effectively removing minerals.
Cleaning and Maintaining Your Home’s Water Softener
Cleaning your water softener is a relatively simple process that can be done with a few basic steps. Follow these instructions to ensure effective cleaning:
Step 1: Turn off the Water Softener
Before starting any cleaning procedure, make sure to turn off the water softener and disconnect it from the power source. This step ensures your safety and prevents any damage to the system.
Step 2: Clean the Brine Tank
The brine tank is where the salt used for regeneration is stored. Over time, the tank can accumulate salt bridges or salt mush, hindering the proper functioning of the water softener. Here’s how to clean it:
- Empty the tank: Remove any remaining salt from the tank and transfer it to a temporary container.
- Remove salt bridges: Use a broom handle or a long tool to break up any salt bridges that have formed. These bridges prevent water from flowing properly.
- Clean the tank: Rinse the tank with clean water to remove any debris or residue. If necessary, use a mild detergent to scrub the tank gently.
- Refill the tank: Once the tank is clean and dry, refill it with the appropriate amount of salt recommended by the manufacturer.
Essential Things to Know About Greenwashing in the Cleaning Industry
Step 3: Clean the Resin Tank
The resin tank is the heart of your water softener, where the ion exchange process takes place. Regular cleaning of the resin tank ensures optimal performance. Follow these steps to clean it:
- Shut off the water supply: Close the inlet and outlet valves connected to the resin tank.
- Release pressure: Open a nearby faucet to relieve any pressure in the system.
- Remove the resin tank cover: Depending on your water softener model, you may need to unscrew the cover or release clips to access the resin tank.
- Inspect the resin bed: Check for any signs of damage, such as cracks or discoloration. If you notice any significant issues, it’s best to consult a professional.
- Clean the resin tank: Using a wet/dry vacuum or a scoop, carefully remove any debris, dirt, or sediment from the tank. Take care not to damage the resin beads.
- Reassemble the tank: Put the tank cover back in place and ensure it is tightly secured.
- Turn the water supply back on: Open the inlet and outlet valves to allow water to flow through the resin tank.
Step 4: Regenerate the Resin Bed
Regenerating the resin bed is a crucial step in maintaining the efficiency of your water softener. Follow the manufacturer’s instructions for regenerating the resin bed, as the process may vary depending on the model. Here are the general steps involved:
- Check the salt level: Make sure the brine tank has enough salt for the regeneration process.
- Initiate regeneration: Set your water softener to the regeneration mode as instructed by the manufacturer.
- Flush the resin bed: The regeneration process will flush out the accumulated minerals from the resin bed and recharge the resin beads.
- Rinse the resin bed: After regeneration, the system will go through a rinse cycle to remove any remaining salt and other impurities.
- Return to service: Once the regeneration and rinsing cycles are complete, your water softener will be ready to resume normal operation.
Regular Maintenance Tips
In addition to periodic cleaning, here are some maintenance tips to keep your water softener in top condition:
- Check the salt level regularly: Ensure that the brine tank has an adequate salt level for regeneration. Refill the tank as needed.
- Inspect for leaks: Regularly check for any leaks in the plumbing connections or the water softener unit itself. Repair any leaks promptly.
- Test water hardness: Periodically test the hardness of the water to ensure your water softener is functioning correctly. Adjust settings if necessary.
- Clean the brine tank annually: Apart from routine cleaning, give the brine tank a thorough cleaning at least once a year to remove any stubborn residue or salt buildup.
- Schedule professional servicing: Consider having a professional inspect and service your water softener annually to address any potential issues and maintain optimal performance.
Conclusion
Cleaning and maintaining your home’s water softener is essential for ensuring that it continues to provide you with soft and clean water. By following the steps outlined in this guide and implementing regular maintenance practices, you can extend the lifespan of your water softener and enjoy the benefits of soft water throughout your home. Remember, a well-maintained water softener leads to better water quality and increased longevity of your appliances. So, make cleaning and maintaining your water softener a part of your regular home maintenance routine.


